Sometimes there are client changes.
In this case, the client liked the general idea of the Grim Reaper slipping on a banana peal, but felt there wasn't enough emphasis on healthy living. The human factor was missing. So the creative team came up with a new scenario, which would require a new storyboard for a second client presentation.
For next week: Read the script, then create a new thumbnail storyboard. Like last time, use a storyboard template and include grey scale values in all your thumbnails.
REVISED SCRIPT
Frame 1: Grim is hiding behind a tree at the park. Camera is behind him looking with him toward a park bench. Someone is sitting on the bench with their back to camera.
Frame 2: Reverse angle - camera is in front of bench, close up on slightly overweight, middle-aged woman in work out clothing. she is happy, eating a banana. Over her shoulder we can see the tree with Grim peaking out from behind the trunk.
Frame 3: Grim begins to creep toward woman.
Frame 4: Woman, oblivious to Grim's approach, tosses banana peel over her shoulder.
Frame 5: CU (close up) on flying banana peel.
Frame 6: Grim wipes out on the banana peel.
Frame 7: In foreground we see a dazed Grim propped up on one elbow, the banana peel on the grass nearby. Further in the distance, the middle-aged woman jogs away, still oblivious.
Frame 8: Quick cut to a hand, finger extended, pressing the ON button on a blender. A fruit smoothy swirls inside the glass pitcher section of the blender.
Frame 9: Quick cut to a hand reaching into frame to pick up a pair of running shoes.
Frame 10: Text screen: Headline: Move It or Lose It Logo: Participaction (you can find the logo here: https://www.participaction.com/en-ca ) Footer: Visit participaction.com
Tuesday, March 20, 2018
Wednesday, March 14, 2018
Storyboarding a TV Commercial, Part 2
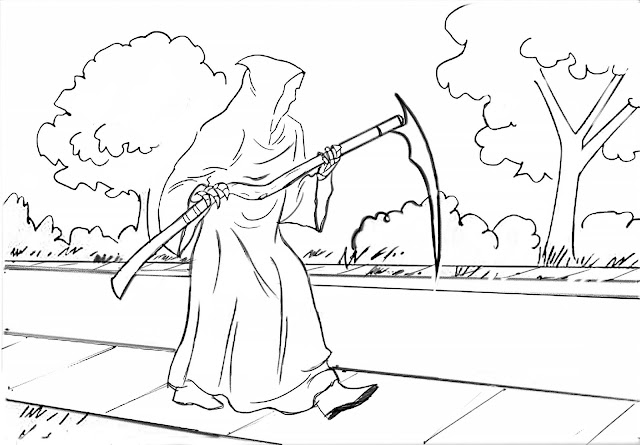
Once you've digitally 'inked' your line art version of the storyboard frames, make sure to turn off (or delete) any layers that contain the photo reference you used as part of your drawing process. What remains should be a clean line art (Multiply) layer directly above the Background layer:
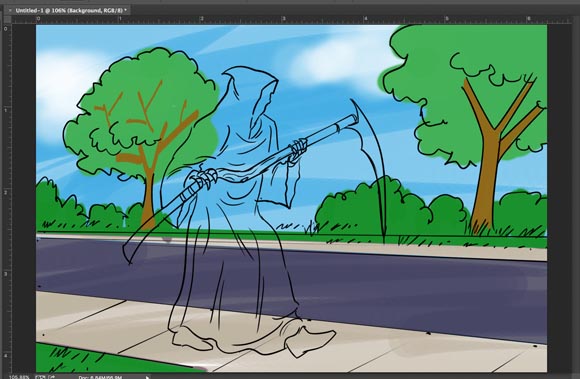
Begin by flat colouring the background on the Background layer. Work from whatever is farthest away (the sky) to whatever is nearest (the road, sidewalk and grass in the foreground).
Flat colour the figure last by using the Polygon Lasso tool to select along the line art of the figure, as I demonstrated in class in Week Four.
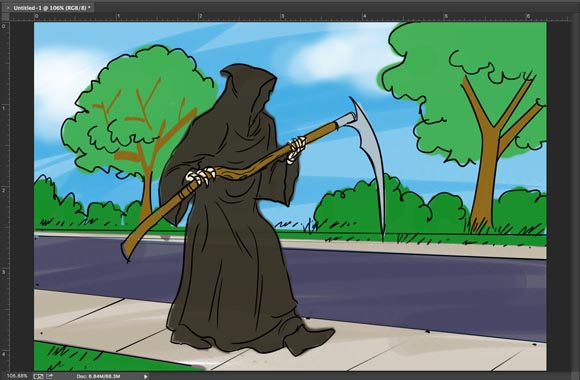
Next, create a Multiply layer for the background and the figure. This layer will be the Shading layer, allowing you to add darker shadow shapes to both the figure and the background, which will heighten the sense of realism.
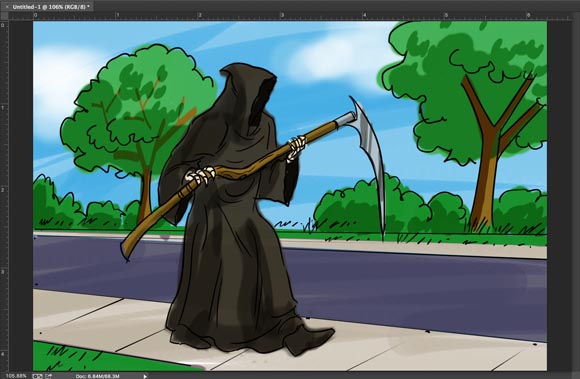
Next, create a Normal layer for the background and the figure. This layer will be the Highlight layer, allowing you to add lighter shapes to both the figure and the background, which will again heighten the sense of realism. Make sure to place the Highlights layer at the top of the layer stack.
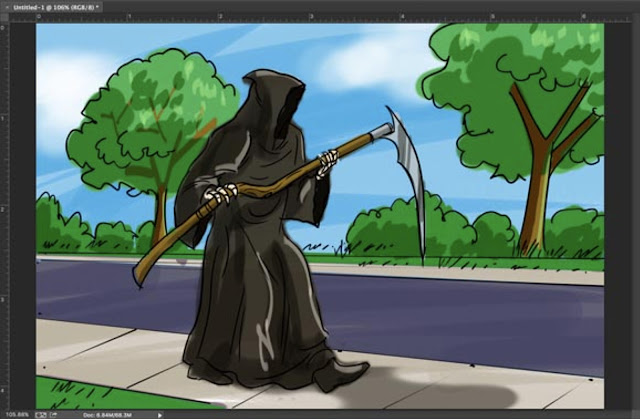
For Week Six: Complete all four frames of your storyboard using the colouring process shown above. Post the stages of colouring on your blog (add this to the thumbnail post from week one of this assignment) - and describe what you did at each step of the process.

Begin by flat colouring the background on the Background layer. Work from whatever is farthest away (the sky) to whatever is nearest (the road, sidewalk and grass in the foreground).

Flat colour the figure last by using the Polygon Lasso tool to select along the line art of the figure, as I demonstrated in class in Week Four.

Next, create a Multiply layer for the background and the figure. This layer will be the Shading layer, allowing you to add darker shadow shapes to both the figure and the background, which will heighten the sense of realism.

Next, create a Normal layer for the background and the figure. This layer will be the Highlight layer, allowing you to add lighter shapes to both the figure and the background, which will again heighten the sense of realism. Make sure to place the Highlights layer at the top of the layer stack.

For Week Six: Complete all four frames of your storyboard using the colouring process shown above. Post the stages of colouring on your blog (add this to the thumbnail post from week one of this assignment) - and describe what you did at each step of the process.
Tuesday, March 6, 2018
Storyboarding a TV Commercial, Part 1
For our first Independent Study Assignment you will learn how to digitally draw and colour storyboard frames, then produce a four frame storyboard in full comprehensive colour based on this art director's script:
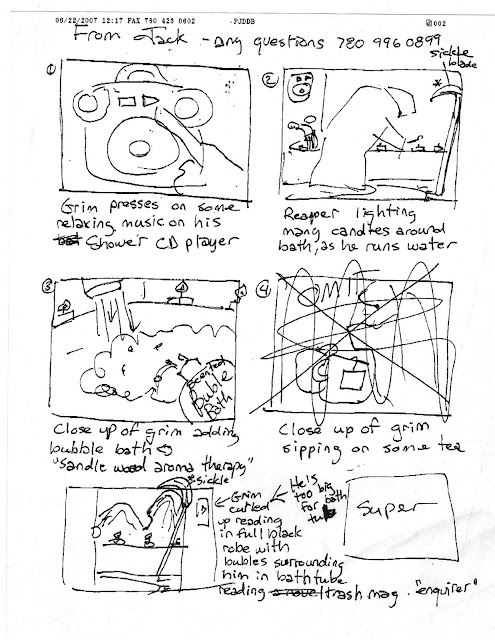
Before beginning your ISA storyboard, here is a practice exercise that will guide you step-by-step through the process of digitally drawing and then colouring another series of frames from the same campaign.
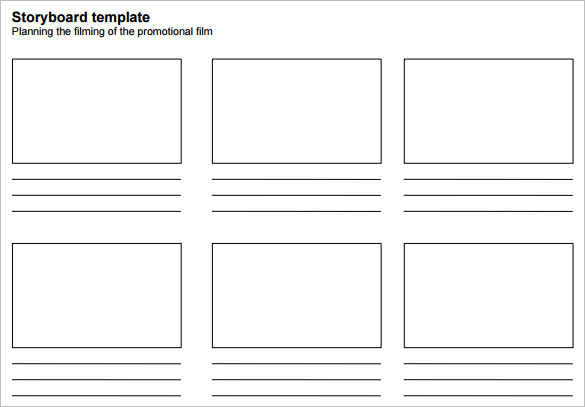
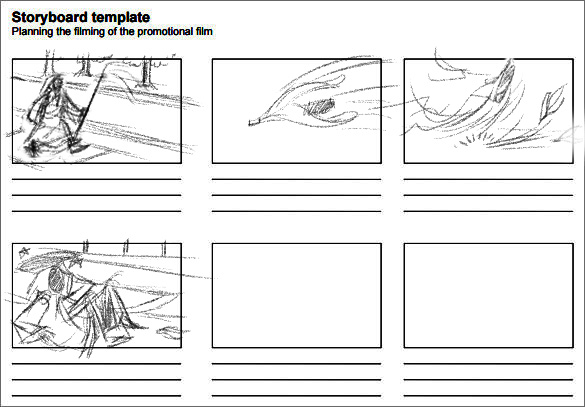
Step One is to thumbnail out the sequence of shots described in the script. You can find many examples of a storyboard template by using Google Image Search. Choose a basic one like this, download it and save it in a folder to use on each assignment.
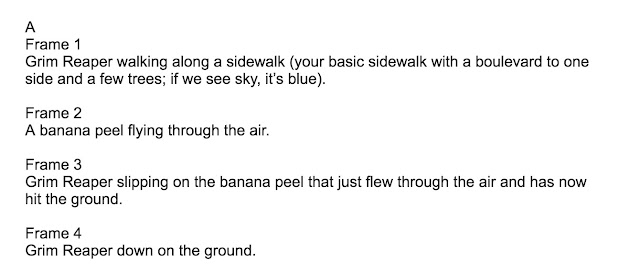
Here's an old script from a storyboard job I did some years ago. The client was the Ministry of Health for the Gov't of Saskatchewan. The premise for this commercial (and several others in the series) was that the Grim Reaper can't kill anyone who exercises and eats well. Read this script, then digitally thumbnail the four shots into the first four frames of your storyboard template.
Post your thumbnail storyboard sequence, which should look something like the example below, on your blog. You can see what other students in our class did by clicking the links in the right hand sidebar.
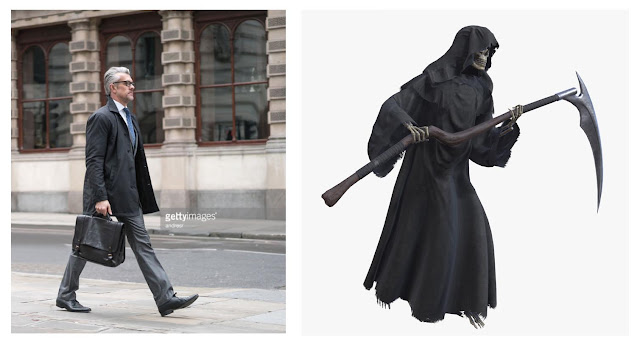
Once you've established your shots in thumbnail form, it's time to draw a better, final version of each frame. This commercial is meant to be shot with human actors, so the drawings can't look overly 'cartoony' - they need to reflect actual human proportions and somewhat realistic surroundings. If drawing realistically 'out of your head' is too challenging, find appropriate photo reference. For example, the opening shot of the Grim Reaper walking down the street would be easier to draw with the help of some photo reference like this:
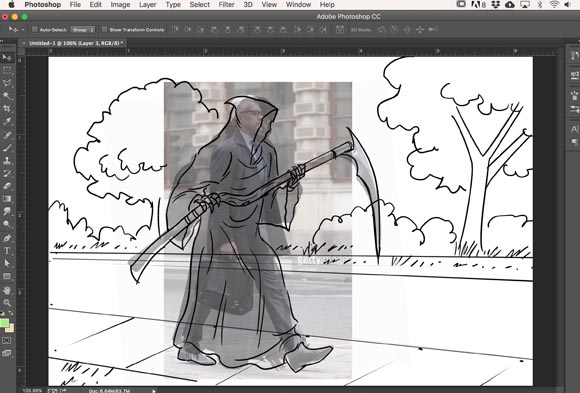
By bringing these photo references into our document and combining them as a Multiply layer with reduced opacity, we can quickly 'ink' a linear version that is the correct (human) proportion, adding some relevant background environment as we go along. NOTE: keep the figure(s) and the background on separate layers for flexibility further on in the process!
Post your line art storyboard sequence on your blog below your thumbnails. Describe your process in a few sentences, explaining how you are working through the project. You can see what other students in our class did by clicking the links in the right hand sidebar of this blog.
Next week you'll be working independently on the colour stage of the four frame script (scroll back to the top to download that script). To see the colouring process step-by-step, click this link to the next blog post.

Before beginning your ISA storyboard, here is a practice exercise that will guide you step-by-step through the process of digitally drawing and then colouring another series of frames from the same campaign.
Step One is to thumbnail out the sequence of shots described in the script. You can find many examples of a storyboard template by using Google Image Search. Choose a basic one like this, download it and save it in a folder to use on each assignment.

Here's an old script from a storyboard job I did some years ago. The client was the Ministry of Health for the Gov't of Saskatchewan. The premise for this commercial (and several others in the series) was that the Grim Reaper can't kill anyone who exercises and eats well. Read this script, then digitally thumbnail the four shots into the first four frames of your storyboard template.

Post your thumbnail storyboard sequence, which should look something like the example below, on your blog. You can see what other students in our class did by clicking the links in the right hand sidebar.

Once you've established your shots in thumbnail form, it's time to draw a better, final version of each frame. This commercial is meant to be shot with human actors, so the drawings can't look overly 'cartoony' - they need to reflect actual human proportions and somewhat realistic surroundings. If drawing realistically 'out of your head' is too challenging, find appropriate photo reference. For example, the opening shot of the Grim Reaper walking down the street would be easier to draw with the help of some photo reference like this:

By bringing these photo references into our document and combining them as a Multiply layer with reduced opacity, we can quickly 'ink' a linear version that is the correct (human) proportion, adding some relevant background environment as we go along. NOTE: keep the figure(s) and the background on separate layers for flexibility further on in the process!

Post your line art storyboard sequence on your blog below your thumbnails. Describe your process in a few sentences, explaining how you are working through the project. You can see what other students in our class did by clicking the links in the right hand sidebar of this blog.
Next week you'll be working independently on the colour stage of the four frame script (scroll back to the top to download that script). To see the colouring process step-by-step, click this link to the next blog post.
Subscribe to:
Comments (Atom)